Learn how to create the retro pillow pattern with step by step instructions.
Pin and save it for latter
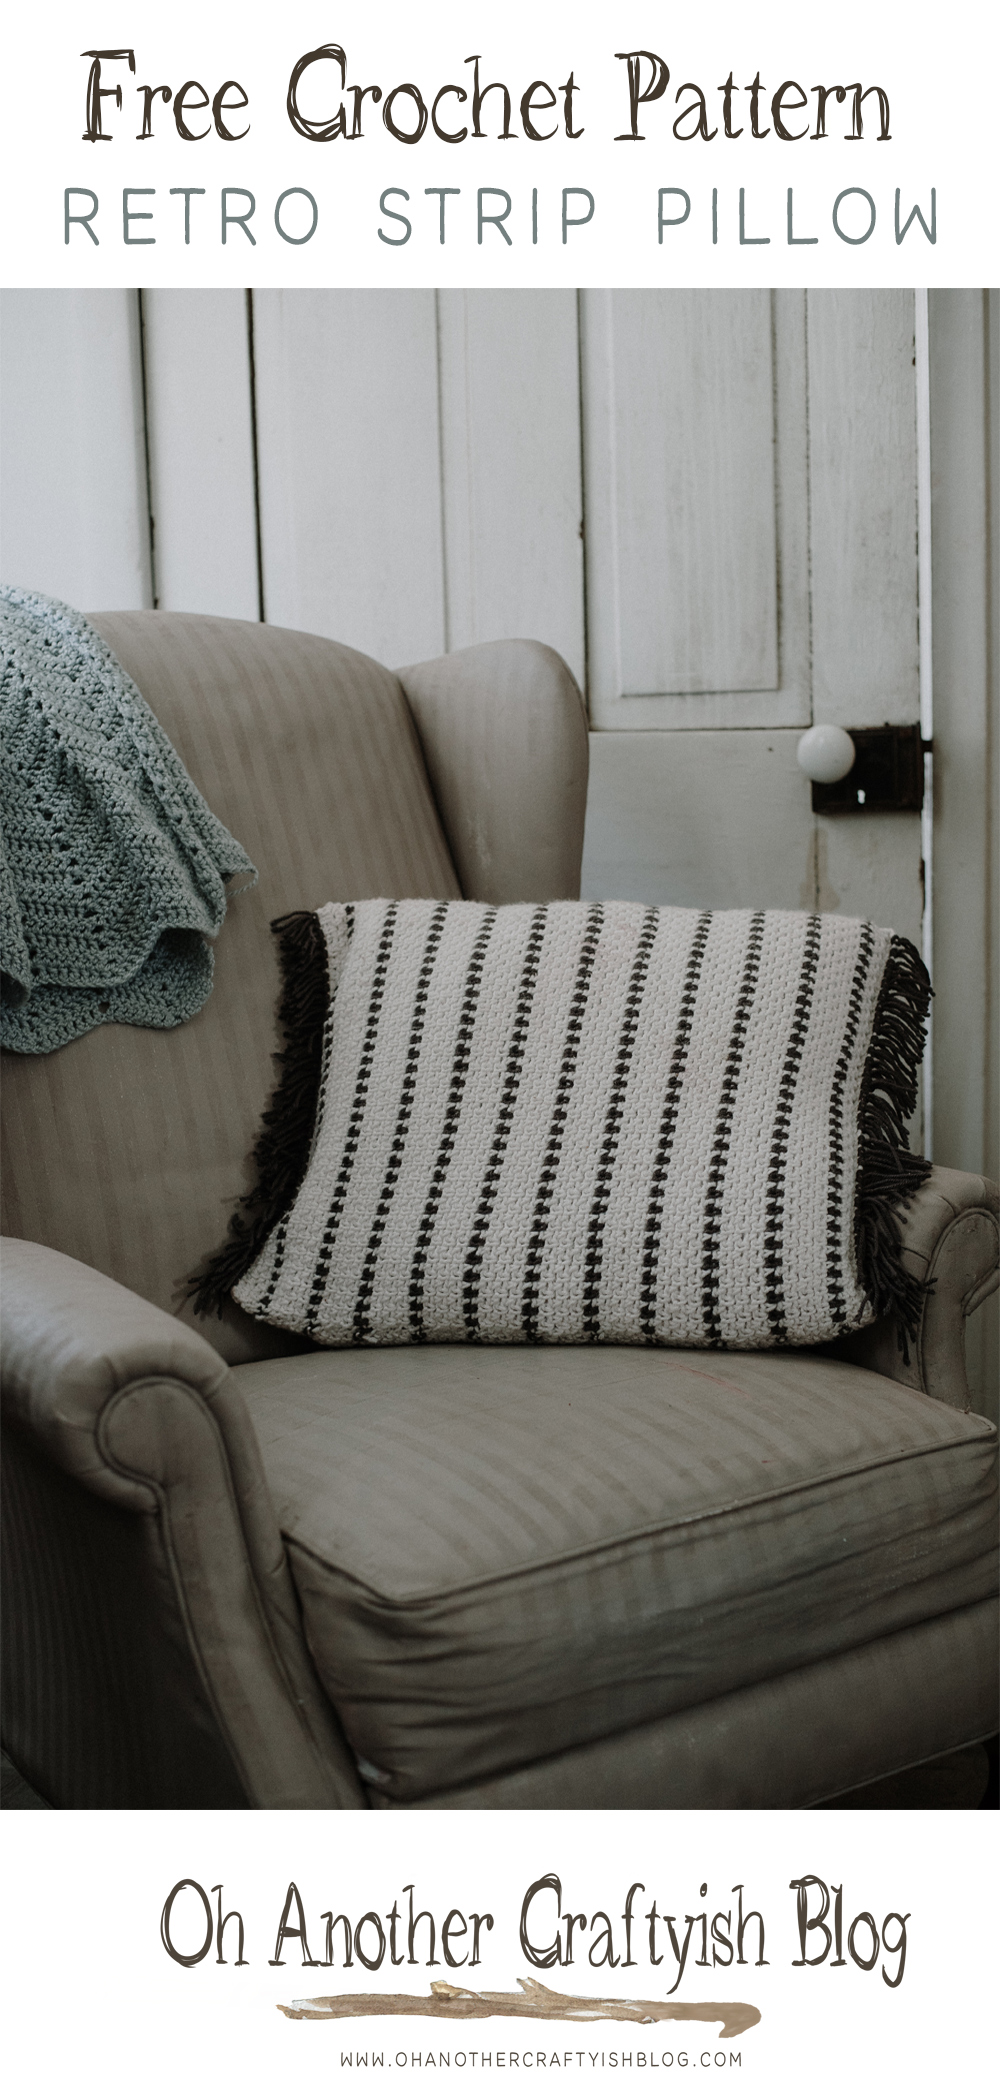
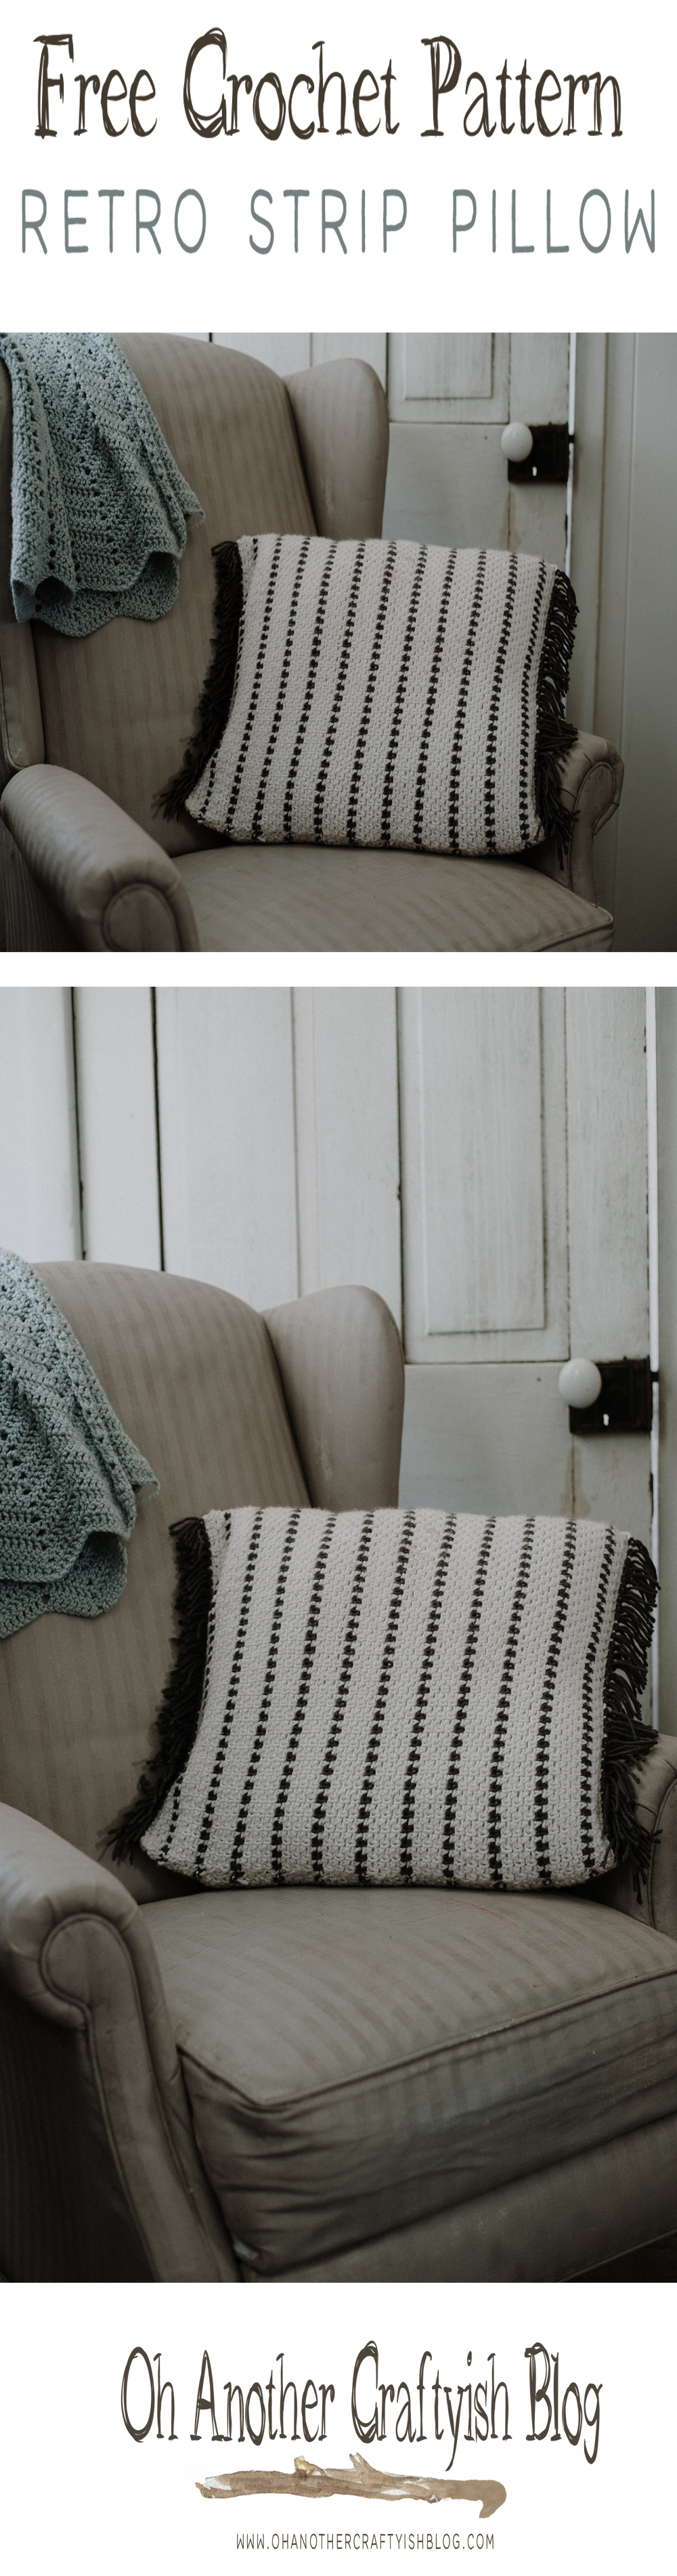
I am so happy to bring you this retro pillow pattern today! It’s got the perfect amount of texture, making it not just visually appealing but also enjoyable to touch. It brings laid-back simple vibes. These vibes can easily blend into any room’s aesthetic. Your style be modern, rustic, or somewhere in between. This retro pillow pattern adds a creative touch to your decor, transforming an ordinary space into a cozy retreat. It sparks joy. It brings a sense of personality to your space. This lets you express your individuality and taste. It makes the perfect home decor accessory, effortlessly enhancing the charm of any room. Plop it on your couch to bring life to your living room, creating an inviting atmosphere for family and friends. Use it as a sham on your bed for a cozy, inviting atmosphere, ensuring that your bedroom is a sanctuary of comfort. The versatility of this retro pillow means you can mix and match colors and textures to suit your style. Making it a fun project to experiment with different materials and patterns. I really hope you get to make one and enjoy the process of bringing this charming design into your home. It’s an opportunity to engage your creativity and perhaps even share the experience and results with loved ones. One who might appreciate your handiwork as much as you do!
Supplies
Hobby lobby (I Love This Yarn) in color Antique and Graphite (Weight 4/ medium- 355 yards) (Please see the notes section on yardage)
5.5 mm (I) Hook (or hook to obtain the gauge)
Tapestry Needle
craft Pillow
Gauge:
Main pattern
4 sts=2 in
4 rows =2 in
Please check your gauge and adjust your hook size accordingly!
Abbreviations:
Ch(s)= Chain(s)
St(s)= Stitch(es)
Sc = Single Crochet
Sk= Skip
Notes:
Please read before you begin.
1 skein of each color in the hobby lobby (I love This Yarn)
Finished measures 21 x 17in
Your rows should always end with a Sc.
Pattern:
Make two of the panels
(Color Antique) ch 68
Row 1: Sc in 2nd ch from hook, Ch 1, skip 1, repeat across, Ch 1, turn. (34 Not Including the ch st)
Row 2-3: Sc in Ch space, Ch 1, skip 1, repeat across, Ch 1, turn. (34 Not Including the ch st)
Row 4: (Color Graphite) Sc in Ch space, Ch 1, skip 1, repeat across, Ch 1, turn. (34 Not Including the ch st)
Row 5-11: (Color Antique) Sc in Ch space, Ch 1, skip 1, repeat across, Ch 1, turn. (34 Not Including the ch st)
Row 12: (Color Graphite) Sc in Ch space, Ch 1, skip 1, repeat across, Ch 1, turn. (34 Not Including the ch st)
Row 13-19: (Color Antique) Sc in Ch space, Ch 1, skip 1, repeat across, Ch 1, turn. (34 Not Including the ch st)
Row 14: (Color Graphite) Sc in Ch space, Ch 1, skip 1, repeat across, Ch 1, turn. (34 Not Including the ch st)
Row 15-21: (Color Antique) Sc in Ch space, Ch 1, skip 1, repeat across, Ch 1, turn. (34 Not Including the ch st)
Row 22: (Color Graphite) Sc in Ch space, Ch 1, skip 1, repeat across, Ch 1, turn. (34 Not Including the ch st)
Row 23-29: (Color Antique) Sc in Ch space, Ch 1, skip 1, repeat across, Ch 1, turn. (34 Not Including the ch st)
Row 30: (Color Graphite) Sc in Ch space, Ch 1, skip 1, repeat across, Ch 1, turn. (34 Not Including the ch st)
Row 31-37: (Color Antique) Sc in Ch space, Ch 1, skip 1, repeat across, Ch 1, turn. (34 Not Including the ch st)
Row 38: (Color Graphite) Sc in Ch space, Ch 1, skip 1, repeat across, Ch 1, turn. (34 Not Including the ch st)
Row 39-45: (Color Antique) Sc in Ch space, Ch 1, skip 1, repeat across, Ch 1, turn. (34 Not Including the ch st)
Row 46: (Color Graphite) Sc in Ch space, Ch 1, skip 1, repeat across, Ch 1, turn. (34 Not Including the ch st)
Row 47-53: (Color Antique) Sc in Ch space, Ch 1, skip 1, repeat across, Ch 1, turn. (34 Not Including the ch st)
Row 54: (Color Graphite) Sc in Ch space, Ch 1, skip 1, repeat across, Ch 1, turn. (34 Not Including the ch st)
Row 55-61: (Color Antique) Sc in Ch space, Ch 1, skip 1, repeat across, Ch 1, turn. (34 Not Including the ch st)
Row 62: (Color Graphite) Sc in Ch space, Ch 1, skip 1, repeat across, Ch 1, turn. (34 Not Including the ch st)
Row 63-69: (Color Antique) Sc in Ch space, Ch 1, skip 1, repeat across, Ch 1, turn. (34 Not Including the ch st)
Row 70 (Color Graphite) Sc in Ch space, Ch 1, skip 1, repeat across, Ch 1, turn. (34 Not Including the ch st)
Row 71-77: (Color Antique) Sc in Ch space, Ch 1, skip 1, repeat across, Ch 1, turn. (34 Not Including the ch st)
Row 78: (Color Graphite) Sc in Ch space, Ch 1, skip 1, repeat across, Ch 1, turn. (34 Not Including the ch st)
Row 79-82: (Color Antique) Sc in Ch space, Ch 1, skip 1, repeat across, Ch 1, turn. (34 Not Including the ch st)
Assembling:
To start your assembling you need to lay both panels on top of one another. Taking your tapestry needle sew around all the side but leaving one side undone.
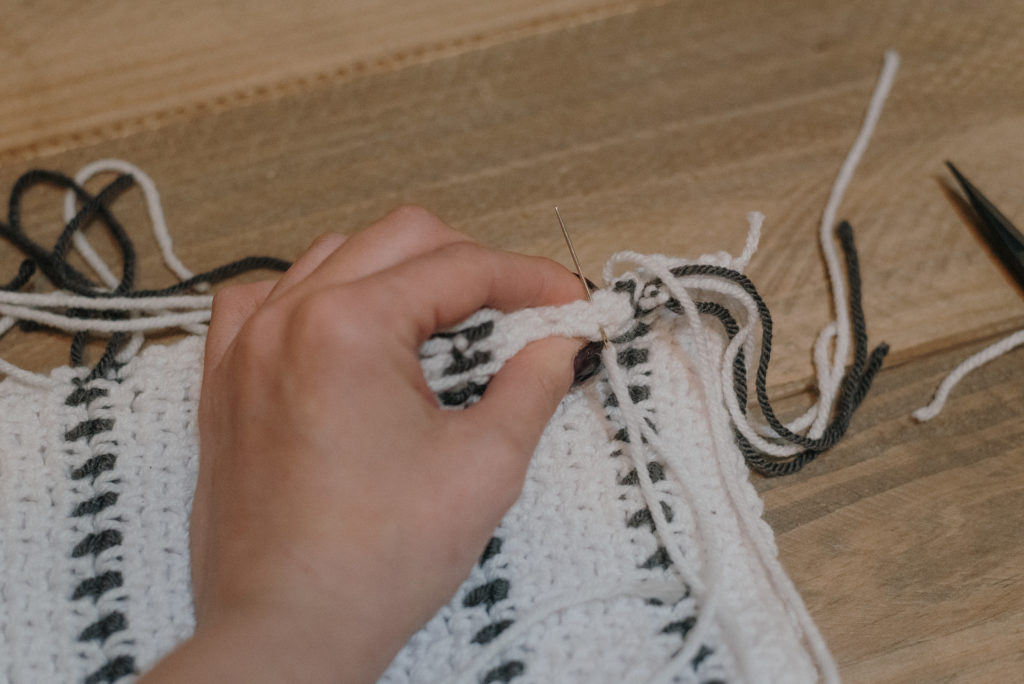
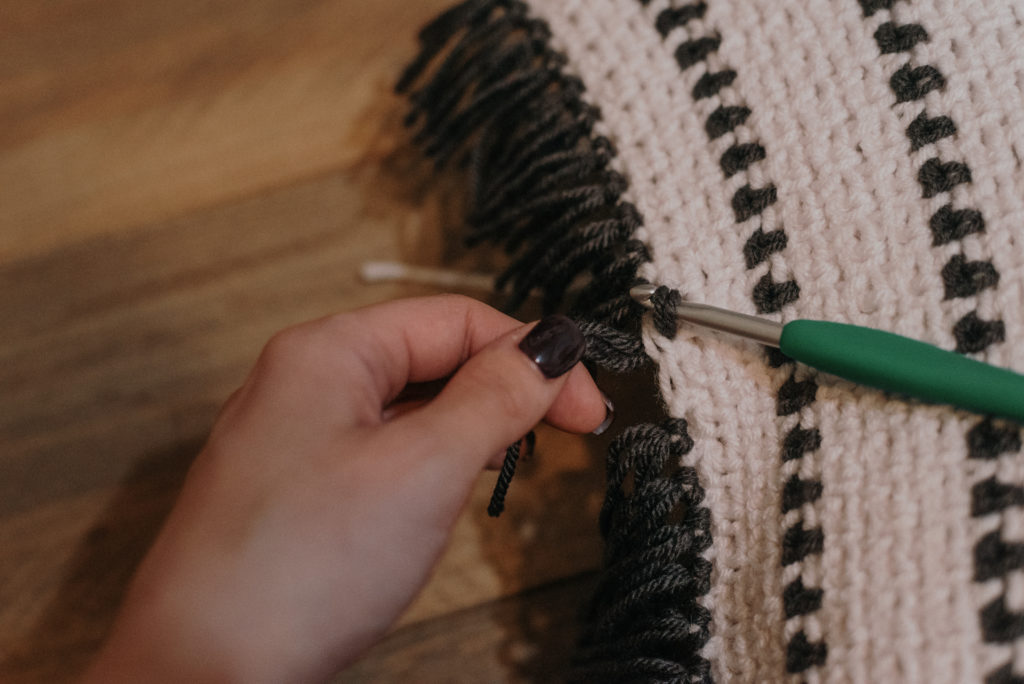
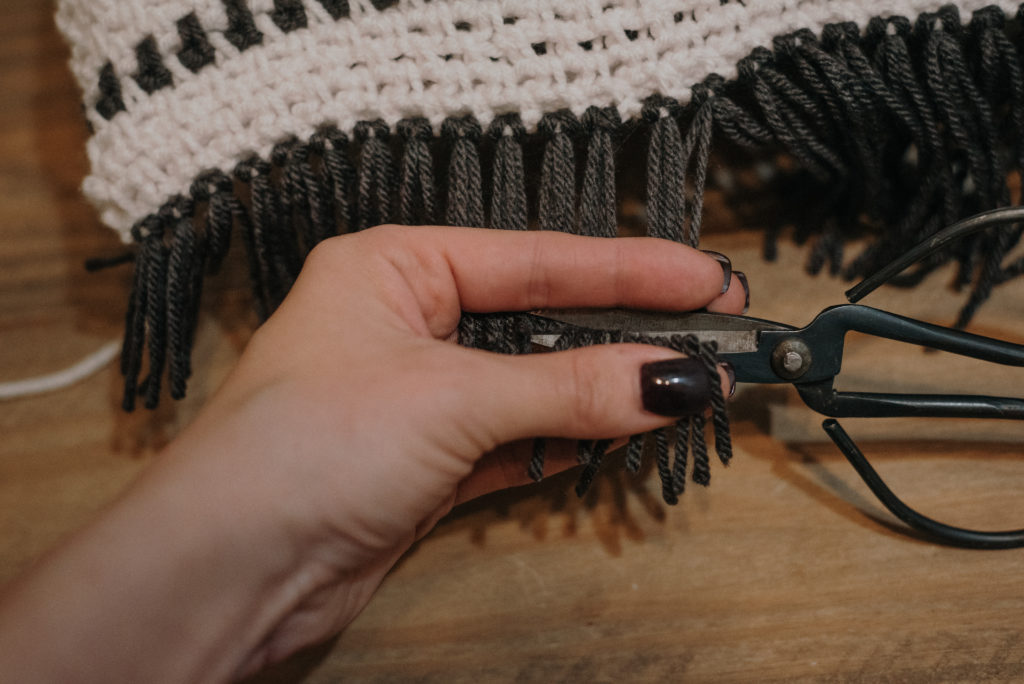
Now insert your pillow and finish off by sewing the last sections. Now attach your tassels. Be sure to cut it all even. Pictures Below.

I hope you have enjoyed this pattern. Be sure to like my Facebook and Instagram to stay updated. Also, be sure to share and use the Hashtag #Retrostrippillow.
Copyright © 2019 Oh Another Craftyish Blog by Tawnya Myers, All rights reserved
Please note all copyrights to this pattern are mine. All copyrights to the pictures are mine for my personal use only. You’re more than welcome to sell your finished work, but if you do, please post a link back to my post. Please do not try to claim this as your own as to this is 100% mine, I put a lot of time and work to create my patterns, Happy Crocheting